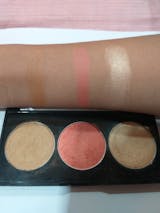
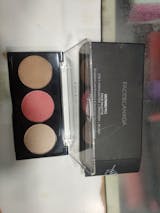
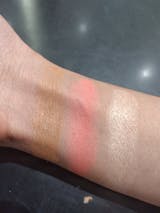
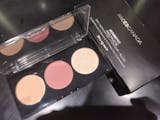
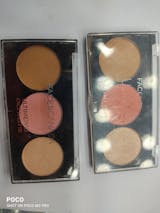
There are 16 color blush and highlighter palette combinations that you can choose from to achieve different looks; this palette truly has everything you need to always look your best. Even more, these colors are designed to match your skin tone perfectly so that you don’t have to worry about looking unnatural or clownish when using them on your face.
The Basics
A blush highlighter palette is an assortment of colors. In makeup, you’ll find color palettes in many different variations—eye shadow palettes, face palettes, and lip palettes are all pretty common these days.
The biggest difference between these types of blush highlighter contour palette products is their intended use. You won’t use your eye shadow as eyeliner and you probably don’t want your lipsticks mingling with your foundation. Instead, you should have separate color-based kits for different parts of your face so that it’s easy to swap colors depending on where they go on your body. That way you avoid smearing foundation onto a pale matte lipstick or mixing up shades that end up looking muddy together.
How to Use it
Here are some steps that you can use as a guideline while applying contour blush highlight palette makeup. Be sure to take your time and don't rush through it. If you feel that you may be prone to making mistakes, do practice a few times before attempting on your face. Always go in order from head to toe, not forgetting neck or feet!
How to use Ultime Pro Face Palette
Makeup, especially eye shadow, can be intimidating if you are unfamiliar with the proper application techniques. This can make it hard to know where to start and how to get the best look from your makeup routine. There are many factors to consider when applying makeup, including product choice, color selection, color scheme, and application techniques. Consider these 10 tips on how to use Contour blush highlighter Ultime Pro Face Palette for successful makeup application every time.
1) Base
One of my favorite products from FACES CANADA is a base. I like it because it evens out my skin tone and provides a smooth canvas for putting on my foundation. Once you find your perfect foundation, apply it after using a base.
You'll notice an immediate difference in your skin's appearance with makeup on top of your base versus without one. The secret is finding which shade works best for you; everyone’s complexion is different so what works for me might not work for you.
2) Blush
Apply a creamy blush and highlighter, such as FACES CANADA Powder Blush in Pink Swoon, to your cheekbones and blend well. While blushes will always look great on everyone, it’s best to stick with colors that match your skin tone. To test shades before you buy them, dab a bit of powder onto your jawline. If it blends into your natural skin tone seamlessly, then it's most likely for you.
3) Highlight
The face blusher with a highlighter palette not only includes 10 different shades of blush, bronzer, and highlighter, but it's also got a pretty handy mirror, making it easier to touch up during a busy day. If you need a fresh summer glow after some time away from your makeup routine, all you have to do is sweep on some illuminator or bronze and then brush on blush for a quick (and believable) natural look.
You can also add bronzer into your foundation for an extra warm winter tone or stick with just a highlighter for a barely-there glow year-round. The only limit is your imagination!
4) Contour
It's important to know how to contour your face blush highlighter palette. It takes a little bit of practice but with some help from YouTube, you'll be able to find techniques that work for you. If you have a large forehead, you may want to outline it and then blend it out so it doesn't look too big.
If you have cheekbones that are too high, contouring your cheeks can make them look more natural in photos. You can also do things like highlight your nose if it is too big or tuck it underneath if it is not quite proportional to your face shape.
5) Lip
A lip color palette is versatile. There are so many different ways you can wear it. It's no wonder that there are so many different shades of lip palettes. Everyone gives you a different look. Whether you want an everyday wash of color or an ombre look, these bronzer blush highlighter palettes will make it easy for you to get exactly what you're looking for.
If you're someone who likes using different looks on different days, then a lip palette is perfect for keeping in your purse. That way when it comes out of your bag, you know exactly what shade will complement your outfit and will give you a beautiful pop of color without being too over-the-top.
6) Eye shadow
If you have a make-up bag, it’s probably filled with dozens of eye shadow options, but it’s hard to remember which goes with what. Take your time and choose a neutral palette that has all your bases covered; nothing says lazy like mismatched eyeshadow!
Most blush highlighter bronzer palettes nowadays come with highlighters and matte shades for contouring, so try not to rely on single shadows for both. A basic palette should include at least two shadows in a base color (the color of your skin tone), two mattes for highlighting/contouring, one shimmery shade, and a cream-based eyeliner. So go ahead—spice up your daily eye routine without looking too overdone.
7) Bronzer
The right bronzer should give you a subtle glow—not a sunburn. If your skin tone is cool, look for a powder with pink or silver shimmer. If your skin is warm, you can get away with deeper brown tones that have no shimmer.
Move slowly when applying the blush bronzer highlighter palette and blend it into your neck and hairline as well so there are no telltale lines. Start by sweeping a light layer of bronzer on top of your cheekbones and then tap off any excess so it doesn't settle into fine lines on your face later.
8) Eyeliner
The liners in a makeup best blush and highlighter palette are great for getting professional-looking winged eyeliner—with a little practice. Using a larger brush and lighter pressure, outline your lash line. Then, follow up with a smaller liner brush (like Bionic’s Angled Liner Brush) for perfect strokes.
Use deep purple as your base color and add silver glitter on top to spice things up! Apply thinly from the outside of your eye toward your inner corner. Some people love putting glitter on their bottom lid (or both lids!) too – just be sure not to overdo it! Don't forget that black eyeliner can help open up small eyes so if you feel like yours aren't fully awakened yet, take care of that first.
9) Eyebrows
Use a brush for eyeshadow application and contour your eyebrows with taupe or brown. For extra definition, try using a flat, angled brush and applying taupe all over your brow. Use a stiff angled brush with brown shadow to fill in gaps or go bold by filling them in completely. To get that high-end look that lasts, try setting with a clear brow gel like FACES CANADA Clear Brow Gel. Finish by combing your eyebrows into place with an eyebrow spoolie!
10) Skincare and primer
The most important thing is, primer should be used first. Blend your primer into your skin with your fingers for about 30 seconds before applying foundation. It will create a blank canvas for you to work with and help the foundation stay in place.
Also, if you are wearing a tinted moisturizer or any form of makeup without SPF, it's good practice to prime underneath those products as well. That way you get an extra layer of protection from sun damage and environmental pollutants that can add up over time and make your skin look older.
Why use Ultime Pro Face Palette
Whether you’re looking to cover up blemishes or just want to give your skin a subtle boost, the FACES CANADA Collection Ultime Pro Face Blush Highlighter and Contour Palette will help you look great and feel confident every day. It features different products that will transform your look and make you feel awesome about yourself, no matter what the situation. Here are just some of the many ways this awesome face palette can improve your life!
1) Keep it simple
It’s easy to get fancy with your blush highlighter contour makeup, but it’s better if you focus on simple, classic looks that flatter your features. You can mix and match colors to create subtle or dramatic effects, depending on what you want. If you’re really into fashion and want a bold look, go for it! You should be able to find something that works with your skin tone and style.
2) Improve your skin with daily application
Our skin is constantly changing, so even if you think your skincare routine is working perfectly, it’s smart to give it a tune-up once in a while. The Ultime Pro-face palette has everything you need for healthy skin. Its daily application of moisturizer, SPF, and anti-aging cream will strengthen your skin barrier against harsh weather and pollutants while also enhancing elasticity and adding moisture.
This effective blush highlighter and bronzer palette skincare routine can be used as needed with step-by-step instructions included on each box of Ultime Pro products. Stay up-to-date on our latest news via our Facebook page and don’t forget to tag us in your before/after pics!
3) Boost your style with contouring and highlighting
Contouring and highlighting blush highlighter bronzer (or strobing) are techniques that change how light reflects off your face. Contouring emphasizes features by creating shadows and highlighting areas of your face. Highlighting enhances features by creating a natural luminescence in specific areas. If you're new to contouring or highlighting, it may seem like a lot of work, but it can be easier than you think if you learn some tricks.
4) Add warmth for winter skin
Whether you’re a winter baby or a spring baby, chances are that cooler weather will leave your skin feeling dry. The extra layer of fat and oil that keeps us comfortable in warm temperatures is lost during cold weather—leaving us with flaky cheeks and patches of red on our chins. To regain some much-needed moisture and prevent irritation, mix one pump of Radiant Priming Moisturizer into your daily skincare routine.
It contains multivitamins B5 and E—both known as natural moisturizers—to protect against environmental damage while adding a layer of hydration under blusher highlighter bronzer makeup. And because it’s oil-free, it won’t feel greasy when you apply your foundation.
5) Great for traveling
This natural complexion blush and highlighter in one palette includes essential products for a fresh look, so you can touch up on the go or give your skin a day of rest without looking like you haven't taken care of yourself. From under-eye concealer and corrector to foundation, blush, and powder—this compact collection has everything you need.
With SPF 15 broad-spectrum protection, it's an easy way to shield your skin from harmful UVA/UVB rays while keeping it healthy-looking and flawless. This convenient blush and highlighter duo palette also features three applicators that make application quick and easy. Keep it in your purse or carry-on bag—you never know when you might need a little pick-me-up!
What Ultime Pro Face Palette consists of
Ultime Pro Faces Canada blush palette comes with a mattifying base primer, two setting powders, and three highlighting powders. It also comes with a brush and a small booklet that gives suggestions on how to use each product.
To test it out, I tried each of these products individually and together as well. All four products worked well; however, I would suggest only using two at a time if you are going for an all-over powder finish (primer + setting powder) or just applying one of them if you are going for more highlighted areas. The highlighting powders work great in certain spots on your face but can tend to look cakey after application. However, you can fix that by using a very light hand when applying!
Contouring tips for beginners
Contouring is the secret weapon of celebrities and makeup professionals everywhere, and if you want to look like your favorite celebrity, you need to be able to master this art form. Even if you’re not looking to contour every day, it’s still good practice to know how to do it in case of an emergency, like when your favorite pair of jeans suddenly shrinks after a trip through the washing machine or when you're running late for work and the only time you have to apply makeup in the one minute before leaving the house.
1) Get ready with the correct skincare
Even when you're staying within your comfort zone and sticking to one product, skincare can get tricky. Makeup—especially if you're using it daily—can easily strip your skin of vital moisture. Experts recommend using an oil-free moisturizer under the Faces Canada highlighter foundation to help seal in extra hydration. Your skin will thank you later.
2) Pick the right brushes
A good Faces Canada blush brush is as important to a makeup look as any product you're applying. However, with so many different brushes on offer, it can be overwhelming to know which ones are best suited to your specific needs. I recommend starting with three different types of brushes: one for foundation, one for powder, and one to blend everything.
My favorite foundation brush is from FACES CANADA Cosmetics and I love using a powder brush from FACES CANADA Beauty (I use their F80 Large Powder Brush). For blending, I use an angled blush brush that I picked up at FACES CANADA (they have some great options). The key here is finding brushes that feel comfortable in your hand and don't shed too much when they're being used. You also want them to apply the product evenly without leaving streaks or lines behind.
3) Choose the best products
When it comes to contouring and highlighting, you’ll find there are dozens of products out there. From highlighters to powders to concealers, many of these products can be used in multiple ways. For example, using a cream or gel highlighter on your cheeks or forehead can double as an eye brightener. While finding what products work best for you takes trial and error (i.e., too dark = bad; not dark enough = bad), one product that never disappoints is a good setting powder.
Applied after foundation/concealer but before blush/bronzer/highlight, it adds subtle luminosity while absorbing oil and minimizing pores on your skin. Some even say they use translucent powder as an alternative to cream highlighters altogether!
4) Understand your face shape
Before you get started with contouring and highlighting, it's important to understand your face shape. Since each face is unique, every person should learn how to contour according to their particular bone structure. Understanding your face shape will also help you understand which areas of your face may require more attention than others and where products like blush or bronzer are most needed.
To properly determine your face shape, grab a hand mirror and look straight into it. Look from left to right as well as up and down at angles (this will allow you to observe profile shapes too). Focus on features like your eyes, nose, and cheekbones.
5) Movements and Timings
Before you start contouring your face with color, it's important to understand what movements and timings are involved. The reason we use a specific order is that you wouldn't start drawing a person's nose before drawing their eyes or mouth. It would look like something was out of place and that things were not in their correct spot on your person.
6) Highlight And Contour For Round Faces
The key to a good contour is adding depth to your face by emphasizing those features you love and minimizing features you wish were more toned down. The first step is determining where on your face you want to add depth. For round faces, highlighting cheekbones will elongate them and a dark contour under cheekbones will slim down roundness and emphasize bone structure.
To show off heart-shaped faces, highlight the top of cheekbones to make them appear thinner. On square faces with strong jawlines highlight below or above cheekbones or along jawlines to minimize thickness around their jawline. Once you've determined where you want to focus your contour highlight these areas with light powder shades that are three shades lighter than your skin tone to create dimension.
7) Highlight And Contour For Square Faces
Try to apply contour only where your face is widest. For a square face, that's in an inverted V shape along your cheekbones and down your jawline. A rounder face will benefit from contour in a 3 shape between your brows and chin (not necessarily just under your cheekbones).
I'd avoid using a highlighter on someone with a square or rectangular face altogether. Instead, you want to create light and shadow with those dark lines. Also, remember that contouring isn't just about what color you're using—it's also about how much of it you're using! For beginners especially, go light on both colors at first. It's better to look natural than dramatic when you start. Your style can change later on!
8) Highlight And Contour For Heart Shaped Faces
If you’re new to contouring and highlighting, one of your first steps should be to identify which shape you have. Start by standing in front of a mirror and pulling your hair back so you can see as much of your face as possible. Then use a ruler or another straight-edged object to outline all of your facial features. Your face shape is what remains when you remove every other line from around your forehead to chin, nose to mouth, and ear to ear.
9) Highlight And Contour For Oval Shaped Faces
If you have an oval face shape—that is longer than it is wide—you’re in luck. Contouring with a bronzer and a Faces Canada blush palette will help give your face some definition and make your cheekbones more prominent. Choose a bronzer that has cool undertones (so it looks natural) and apply it just underneath your cheekbones. Blend to soften any harsh lines.
Then choose a blush with warm undertones (think rose, coral, or peachy pink) and dab it onto apples of cheeks using circular motions to make them appear rosier. For good measure, line lips with a lipstick or liner in the same shade as your blush!
10) Practice Makes Perfect
Many people use contour as a substitute for a full face of makeup; however, practicing your technique on regular days with just your everyday foundation will ensure that you’re ready to hit takeoff when it comes time to wow friends with contour-makeup looks.
Although there are ways you can fake contour without knowing how to do it. Learning how to add dimension with bronzer and highlighter is much more difficult if you don’t know what you’re doing. Practice different techniques on yourself before you attempt them on someone else!
How to find your contour shade
Before you can start contouring, you'll need to find your contour shade. Contours come in a variety of colors and undertones (i.e., pink vs. yellow).
Your contour color should match your skin tone as closely as possible. If you're looking to create dimension along your cheekbones and want them to look natural and undetectable, choose a cool undertone color that is just a shade or two darker than your foundation or concealer—you shouldn't be able to detect it on its own but it should appear darker when blended out over foundation/concealer. This can also be applied along with other features of your face like around your eyes and nose.
How to contour your face
Contouring is one of those makeup techniques that are either loved or hated. When done right, contouring can make your features pop and put a spotlight on them. However, when done wrong, the contour can wash you out or just look plain weird.
It's easy to see why many women get a little nervous about trying out an advanced technique like contouring—and it's not a technique that you want to dive into blindly. To help beginners add some depth and dimension to their faces, we've created this easy step-by-step guide on how to contour your face like a pro!
Contour hacks
You know contouring is one of those makeup techniques that can take a plain face from zero to 100 real quick. But did you know there’s more than one way to highlight your best features? The basic formula includes using darker and cooler shades on areas you want to minimize (for example: under your chin or on either side of your nose), and lighter and warmer tones in places you want to bring out (like cheekbones). Bonus—they’re so easy even a beginner can master them!
Contour tips and tricks
Contouring is not a difficult skill to master—and with a little practice and attention to detail, you’ll be able to make your face look slimmer or more prominent.
Here are some easy tips to help you get started:
- Get ready before you start contouring. Use an eyeshadow primer on your eyelids to ensure that your eyeshadow sticks throughout your day.
- Use products in complimentary colors. If you're going dark on one side of your face and light on another side, use a foundation that matches both shades so they blend seamlessly together.
- Practice beforehand: don't just wing it when it's time for real-life application! What looks good on paper may not translate well onto skin.
How to choose your blush shade
Before you can learn how to contour your face with blush, you first need to know which colors will best compliment your skin tone. To figure out what color Faces Canada blush looks best on you (and will provide maximum contrast against your skin), look in a mirror and locate your natural cheekbones. It might be easier to do if you part your hair.
The tops of where these bones are should be relatively dark when compared to the rest of your face. Any lighter area should be avoided in contouring. Also worth noting is that these areas are probably less naturally tanned than other parts of your body, meaning they're lighter even if they have a nice summer glow about them.
How to apply blush to uplift your face
Blush is a cosmetic applied to the cheeks to bring color and life to your face. The application of blush adds both colors and glow. Applying blush not only colors your face but also highlights particular features on your face, so there’s no limit on where you can apply it.
A little goes a long way when it comes to blushing; use too much, and you’ll look like a clown! Most experts agree that applying blush is one of those less is more situations. You should start with using less than what you think looks good and then build up from there if needed.
How to apply blush for a sunkissed look
A sunkissed look is a popular summer trend that works on all skin tones. Many Faces Canada blushes makeup artists apply their blush in a circle around their cheekbones to create definitions and highlight their faces. But how do you do it?
Apply your blush before you contour with powder foundation and concealer. Once those products are set, use a fluffy brush or powder puff to apply your blush under your cheekbones and towards your nose. It’s okay if it gets on your ears; you can clean up after you finish! Set everything using translucent powder so that it doesn’t rub off onto clothing or hair during the day.
What is highlighter
Highlighter is applied over your cheekbones, nose, and forehead to give a subtle glow. Choose a matte highlighter (shimmery highlighters tend to accentuate wrinkles). Apply with a soft brush in gentle dabbing motions.
To avoid looking like a disco ball, blend well. For best results use it as part of a complete makeup routine. Then use a lighter foundation or concealer on top of it. Highlighting helps give that bright-eyed glow that we all want!
What a highlighter does
For all you beginners out there, who don’t know what a highlighter does (I didn’t), I have summed it up in three words. Those three words are illuminator, strobing and highlighting. Highlighters add light to your face. It highlights your cheekbones and makes them pop! Not only that but it helps gives off an airbrushed look even if you don’t own an airbrush!
Think of yourself as being in front of a professional photographer's camera when applying a highlighter (or powder). The camera adds five pounds and so does overapplying your highlight/strobing powder! Highlight (strobing) where light would naturally hit you on your face.
Where to apply highlighter
A well-contoured face doesn't have to be super dramatic. Highlighter is a great way to enhance your natural bone structure and give your face dimension. There are different places you can apply highlighter, but here are some ideas on where you should put it. If you have very clear cheekbones already and want to accentuate them more, apply a highlighter under them.
How to blend contour, blush, and highlighter properly
The blend is key when it comes to contouring and shading. Use a brush or your finger (if you don't mind applying the product with an unwashed finger) to create gradients between shades. This will give your face dimension and make everything look more natural. If you have pale skin, choose a bronzer blush highlighter palette that's two shades darker than your skin tone; if you have darker skin, choose one shade darker than your base color.
And remember: Apply bronzer/contour first so that there isn't any leftover highlighter on your face! Once you've applied all of these products properly and blended everything out, check yourself in a mirror sideways--you'll notice how much more natural it makes everything look!
How to remove Ultime Pro Face Palette products properly
Removing your makeup is just as important as applying it to help keep your skin looking healthy and fresh. To do so, you'll need a good remover. There are plenty of options on the market with varying prices and ingredients (oil-based vs water-based).
If you have sensitive skin that easily reacts to products then it may be better to look into one that is oil-based. It will remove most of your makeup while also removing excess oils from pores. However, if you're wearing long-lasting waterproof mascara or eyeliner you may want something different - one that won’t irritate your eyes and still be able to remove stubborn formulas with ease.
FAQs
How do I decide on my contour shade?
The blush highlighter combo shade you should choose will be determined by your skin tone. If you have a warm or olive skin tone look for shades that are slightly deeper than your natural skin color. The same goes if you have a cool or pink undertone but you want to avoid cool and purplish shades of contour.
The most important step is to get an idea of what contour looks like on your face without actually putting any makeup on it first. Look at yourself in a mirror and see where it's darkest on your face and then decide where exactly would be your cheekbones, temples, the nose ridge, etc. If not sure try looking up tutorials online which will help you decide where exactly is the best place to apply contour shade to give an illusion of chiseled face structure.
What is the quantity of the products?
Contour kits are meant to have at least 2 highlight and 2 contour shades. You don't need more than that. Stick with 2 or 3 different contour shades, but pick a few highlight shades (so you can mix them).
If you want to splurge on just one kit, I’d say get ABH’s The Contour Kit ($40) or FACES CANADA Ultimate Coverage Complexion Kit ($46). Both of these provide excellent quality products for a decent price. You won’t be able to find anything cheaper because of how popular these products are. Most cheap contour kits sell from $10-$15 and there is a HUGE difference in pigmentation/bendability between higher-end and drugstore contour products.
Is Faces Canada setting spray good for oily skin?
Faces Canada setting spray is recommended for those who have oily skin. This type of setting spray helps to ensure that your makeup stays in place for a long time and you don’t look like you have excess oil on your face.
Faces Canada setting spray dries very quickly and isn’t too greasy, which are both excellent qualities for a product with claims to prolong makeup wear. You should also note that Canada setting spray works especially well for brides to help ensure that their wedding day makeup remains flawless throughout photos and festivities after walking down the aisle.
Is it safe for people with sensitive skin?
No. Contouring requires precise shading and blending to create natural results. You'll likely irritate your skin if you try it with a product that isn't made specifically for contouring. Be aware of products that contain alcohol and perfumes—they may cause redness and irritation. If you need help finding a specific product or want to learn more about contouring, get in touch with us today!
Can I wear it all day?
Contour kits have a powdery finish that makes them easy to blend and work with throughout the day. Unless you're planning on swimming or sleeping in your contour kit, it will be fine during most activities. However, it is recommended to take off your makeup at night because sleeping can cause buildup on your skin and lead to breakouts.
Because of its creamy consistency, makeup artists recommend using a liquid foundation if you want something more long-lasting; however, its coverage will be too thick and heavy if used solely as a contour product. It's recommended by many professionals that you don't use any other kind of powder over the top of your contoured look; foundations tend to change both color and texture when layered over makeup such as bronzer or blush.
 Cash on delivery available for 22k+ pincodes
 Hassle free returns within 48hrs
 Ships in 5 - 6 hours
 100% Original Products





 Cash on delivery available for 22k+ pincodes
__original.jpeg?auto=format&w=160)
__original.jpeg?auto=format&w=160)
